How to Compress Videos Without Losing Quality
Learn how to shrink massive files instantly. Use an online video compressor to maintain perfect quality, boost site speed, and share media easily.
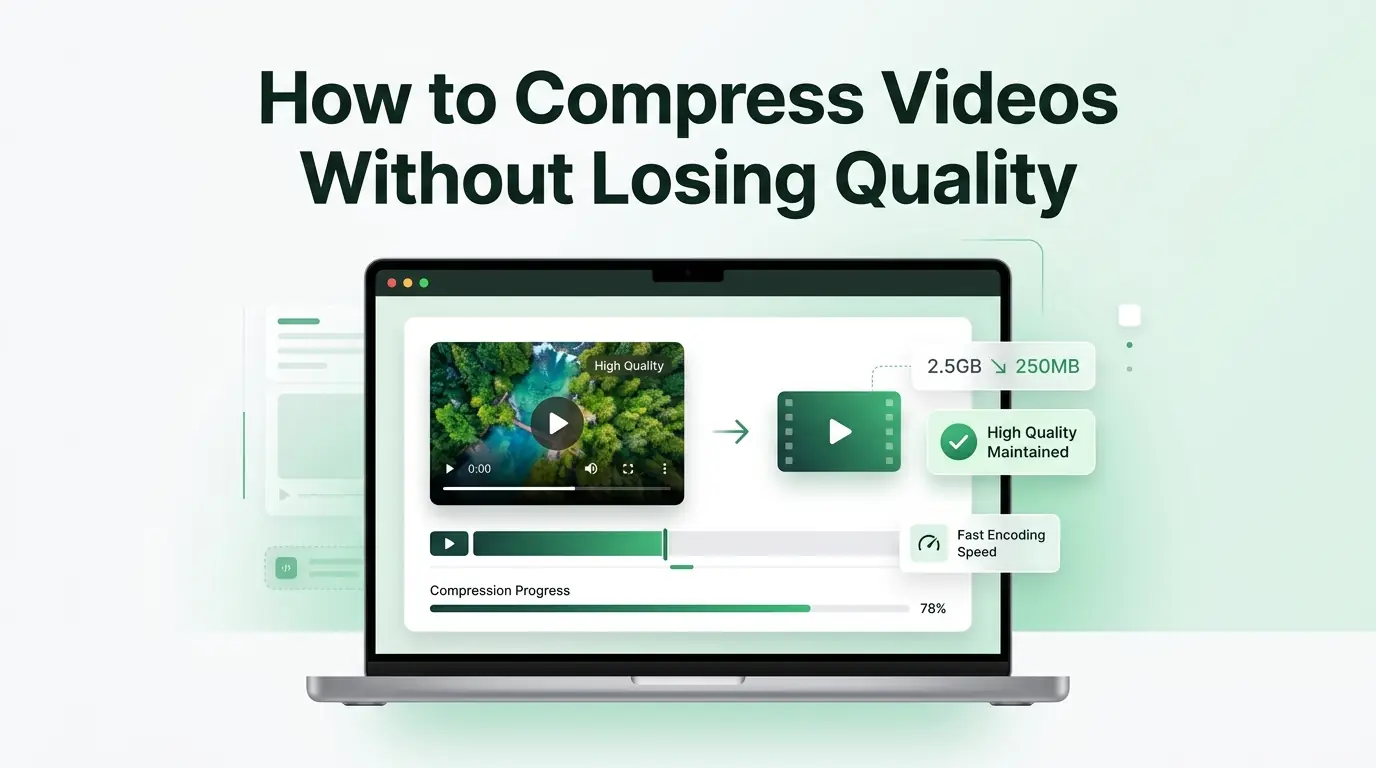
You just spent hours filming and editing a fantastic visual presentation for your business or a fun vlog for your followers. You proudly click the export button, ready to share your masterpiece with the world. Then, disaster strikes. Your computer tells you the file is too large to attach to an email. Your website platform refuses to upload it. If you try to send it through a messaging app, the app ruins the footage until it looks like a blurry, blocky mess.
Video files are becoming larger every single year. Our modern smartphones and digital cameras easily shoot in stunning 4K resolution. While this creates beautiful footage, it also creates massive digital roadblocks. Everyday users, bloggers, and business owners constantly find themselves trapped in situations where they desperately need smaller media files. You might need to free up storage space on your phone, speed up your business website, or simply send a quick recording to a client.
The ultimate challenge is reducing that massive file size while keeping your footage looking crisp and professional. Nobody wants to share a pixelated, ugly recording. In this comprehensive guide, you will learn exactly how to shrink your files safely. We will explore how an Online Video Compressor works, which settings matter the most, and how to balance digital weight with visual beauty.
What Does Video Compression Mean?
Understanding Video Compression
At its core, compression is simply the process of making a digital file smaller. Imagine packing a suitcase for a long vacation. If you just throw your clothes inside, the suitcase fills up quickly. However, if you carefully fold and roll your clothes, you can fit the exact same amount of items into a much smaller space. A Video Compressor does the exact same thing with digital data. It organizes and packs the digital information more efficiently so the file takes up less room on your hard drive.
Why Video Files Become So Large
Several factors work together to create massive media files. The first factor is resolution. Resolution refers to the actual number of pixels on the screen. A 4K recording has millions of more pixels than a standard high-definition recording, which requires significantly more data.
The frame rate also plays a huge role. Moving pictures are just a series of still photos played very quickly. If you record at sixty frames per second instead of thirty, your computer has to save twice as many pictures for every second of footage. Furthermore, a high bitrate forces the file to hold onto more detail per second. When you combine high resolution, fast frame rates, high bitrates, and a long video duration, your file size explodes into gigabytes of data.
Compression vs. Quality Loss
There is a very common myth that shrinking a file automatically ruins the visual quality. This is simply not true. It is entirely possible to reduce a file by half its size without your human eyes ever noticing a difference. Modern technology uses incredibly smart mathematical formulas to remove invisible data. For example, if you film a blue sky, the software does not need to save the exact color of every single blue pixel. It just remembers that the entire top half of the screen is blue. This clever trick saves massive amounts of data while keeping the picture completely intact.
Benefits of Compressing Videos
Faster Upload Speeds
Time is money, especially for business owners and content creators. Waiting two hours for a massive file to upload to YouTube or Facebook is incredibly frustrating. When you shrink your files beforehand, your upload times drop from hours to mere minutes.
Reduced Storage Requirements
High-definition media will eat your hard drive space alive. If you film content regularly, you will quickly find yourself buying expensive external hard drives or paying for premium cloud storage subscriptions. Shrinking your media keeps your digital storage clean and saves you a lot of money in the long run.
Easier File Sharing
Most email providers strictly limit attachments to twenty-five megabytes. Many project management tools have similar limits. When you learn how to optimize your media, you can bypass these annoying restrictions and send your work directly to colleagues and clients without using complicated third-party transfer services.
Better Website Performance
If you run a blog or a business website, adding heavy media files to your homepage is a dangerous game. Heavy files force your visitors to wait for the page to load. Most people will leave your site if it takes longer than three seconds to appear. Lighter files ensure your website stays lightning fast and keeps your visitors happy.
Improved Streaming Experience
When someone clicks play on your website, their internet connection has to download the data in real time. If the file is too heavy, the playback will constantly pause and buffer. An optimized file guarantees a smooth, uninterrupted viewing experience for your audience regardless of their internet speed.
Lower Bandwidth Consumption
Every time someone watches a clip on your website, it consumes bandwidth from your web hosting plan. If your files are unnecessarily huge, you will quickly exceed your monthly bandwidth limits. This can result in your website going offline or your hosting company charging you expensive penalty fees.
What Causes Video Quality Loss?
Excessive Compression
The most common reason footage looks terrible is simply pushing the software too far. If you try to squeeze a two-gigabyte movie down to five megabytes, the software has to throw away too much important data. You must be realistic about how small a file can get before the picture starts breaking apart.
Low Bitrate Settings
Bitrate is the amount of data allowed to flow for every second of footage. If you set the bitrate too low, the software simply does not have enough digital ink to draw a clear picture. Fast-moving scenes will suddenly look blocky and smeared because there is not enough data to keep up with the motion.
Repeated Video Exports
Think of digital media like a photocopy of a document. A first photocopy looks great. If you take that photocopy and copy it again, it looks a bit worse. If you run your footage through an editing program, export it, and then put it through another tool later, the quality degrades every single time.
Poor Codec Selection
A codec is the specific software engine that handles the packing and unpacking of your data. Using an outdated or low-quality codec is like using a messy packer for your suitcase. It will do a sloppy job, resulting in either a file that is too large or a picture that looks awful.
Incorrect Resolution Changes
Sometimes people try to shrink a file by drastically changing the physical dimensions. If you take a crisp 4K recording and aggressively scale it down to an ancient, tiny resolution, it will obviously look blurry when someone tries to watch it on a modern computer monitor.
Best Ways to Compress Videos Without Losing Quality
1. Use a Modern Video Codec
H.264
This is currently the most popular and widely accepted codec in the world. It provides a fantastic balance between keeping the file size manageable and maintaining excellent visual clarity. Almost every device, website, and television can play an H.264 file without any issues.
H.265 (HEVC)
This is the newer, smarter sibling of H.264. It was specifically designed to handle massive 4K files. It is incredibly efficient and can often shrink a file to half the size of an H.264 file while maintaining the exact same visual beauty. However, older computers sometimes struggle to play it smoothly.
AV1
This is the next-generation technology built specifically for the internet. It offers absolutely incredible efficiency and is becoming very popular for web streaming. Major platforms like YouTube are already adopting it to deliver high-quality media at very low data rates.
2. Adjust Video Bitrate Carefully
What Is Bitrate?
You can think of bitrate like a water pipe. A higher bitrate is a wider pipe that lets more water flow through. More water means more detail, but it also creates a heavier file. Lowering the bitrate is the single most effective way to shrink a file, but you must do it carefully.
Recommended Bitrates for:
For standard 720p high-definition footage, a bitrate between two and four megabits per second usually looks great. If you are working with full 1080p footage, aim for a bitrate between five and eight megabits per second. For massive 4K footage, you generally need a bitrate between twenty and thirty megabits per second to keep the sharp details intact.
Why Lowering Bitrate Too Much Hurts Quality
If you choke the data pipe too much, the software panics during complex scenes. If you show a calm, still shot of a coffee cup, a low bitrate is fine. But if you show a fast-moving waterfall or a burst of confetti, a low bitrate will turn the screen into a mess of ugly, digital blocks.
3. Reduce Resolution Only When Necessary
When 4K Is Unnecessary
We all love the idea of 4K, but the reality is that most people watch internet content on six-inch smartphone screens. A 4K file provides absolutely no visual benefit on a tiny phone screen, but it takes up four times more space than a standard high-definition file.
Converting 4K to 1080p
If you know your audience will primarily watch your content on phones or laptops, scaling your 4K footage down to 1080p is a brilliant move. This instantly slashes your file size dramatically, and your viewers will never notice the missing pixels on their everyday devices.
Maintaining Sharpness
When you do decide to lower the resolution, make sure your editing software uses high-quality scaling methods. A good Online Video Compressor will smoothly resize the pixels so the final image remains sharp and vibrant instead of looking soft and out of focus.
4. Trim Unnecessary Footage
Remove Intros and Outros
Sometimes the easiest way to remove data is to literally remove time. Do you really need a thirty-second animated logo at the start of your presentation? Cutting out long, boring introductions instantly reduces the digital weight and keeps your audience more engaged.
Cut Unused Clips
Go through your timeline and look for dead space. Remove those long pauses where nobody is speaking. Trim away the awkward fumbling at the end of the recording before you turn the camera off. Every second you cut removes megabytes of unnecessary data.
Reduce Overall File Size Naturally
By simply being a ruthless editor, you solve your size problems before you even touch complicated export settings. A shorter, punchier presentation is always better for file size and better for viewer retention.
5. Optimize Frame Rate
Common Frame Rates Explained
Movies in the theater generally use twenty-four frames per second for a cinematic look. Television and standard internet media usually run at thirty frames per second. High-speed action sports or video game recordings often use sixty frames per second to capture super smooth motion.
When Lowering Frame Rate Makes Sense
If you recorded a simple tutorial of yourself talking at your desk at sixty frames per second, you are wasting massive amounts of data. Dropping the export down to thirty frames per second will literally cut the visual data in half, and nobody will notice any difference in a quiet talking-head shot.
Step-by-Step Guide to Compress Videos
- Open your internet browser and navigate to a secure platform like multicompressor.com to begin the process.
- Upload your original master recording directly into the secure processing area.
- Choose your desired output resolution based on where you plan to share the final product.
- Select a highly efficient modern codec to ensure maximum space savings.
- Set your target bitrate to a moderate level to balance the visual clarity with the new digital weight.
- Click the processing button and download your newly optimized media securely to your computer.
Best Video Formats for Compression
Choosing the right container for your data is an important step. A Video file format is essentially the digital box that holds your audio and visual data together.
MP4
This is the undisputed king of digital media. It plays nicely with absolutely everything. From Apple devices to Android phones to smart televisions, an MP4 file will open instantly without any frustrating error messages.
MOV
This container was created by Apple and is heavily used by professional editors. While it holds magnificent visual detail, it often creates very heavy files. It is great for editing but not ideal for uploading to a website.
WebM
Google developed this specific container purely for internet use. It is incredibly lightweight and plays beautifully directly inside web browsers. If you want to embed a fast-loading clip onto your business homepage, this is a spectacular choice.
MKV
This is a highly flexible container that can hold multiple audio tracks and subtitles at the same time. It is brilliant for archiving movies but is often completely rejected by social media apps and mobile devices.
Format Comparison Table
| File Format | Device Compatibility | Storage Efficiency | Best Use Case |
|---|---|---|---|
| MP4 | Excellent | High | Social Media and General Sharing |
| MOV | Good | Low | Professional Video Editing |
| WebM | Good | Very High | Website Backgrounds and Embedding |
| MKV | Poor | High | Personal Movie Archiving |
Recommended Compression Settings
For Social Media Uploads
Social platforms like Instagram, TikTok, Facebook, and YouTube Shorts have very specific desires. They want files that look great on phones but load instantly over cellular networks. For these platforms, you should always export as an MP4 file. Keep your resolution at 1080p, as most platforms will simply shrink a 4K file anyway. Use a standard thirty frames per second and set your bitrate around eight megabits per second. This guarantees a crisp, colorful post that uploads in seconds.
For Websites
When placing media directly on your own website, speed is your ultimate priority. You should consider using the WebM format if your platform allows it. Scale the resolution down to 720p or 1080p depending on how large the player window is. Lower your bitrate to around three to five megabits per second. This ensures your website remains fast and snappy, which keeps Google search engines very happy.
For Email Attachments
Email is incredibly strict. You usually only have twenty-five megabytes of space to work with. To survive email restrictions, you must make sacrifices. Drop the resolution down to 720p. Use the highly efficient H.265 codec if possible, and lower the bitrate to around two megabits per second. It will not look like a cinematic masterpiece, but it will fit in the email and deliver your message clearly.
For Online Courses
If you sell educational content, your students need to see text and details clearly. You cannot sacrifice too much visual fidelity. Stick to 1080p resolution and a solid bitrate of eight to ten megabits per second. This keeps the text on your presentation slides sharp while keeping the overall file small enough for your students to stream without buffering.
For Cloud Storage
If you are simply trying to clean up your computer and store family memories in the cloud, you want maximum quality in the smallest possible footprint. Use the H.265 codec because it was designed specifically for this purpose. Keep your original resolution, but let the smart codec handle the bitrate automatically. You will save gigabytes of expensive cloud storage space while preserving your memories perfectly.
Common Video Compression Mistakes
Compressing Multiple Times
The absolute worst thing you can do is run an already small file through a Video Compressor again. Every single pass removes data. If you compress a file, download it, and then upload it to compress it a second time, the colors will band together and the edges will become terribly jagged. Always work directly from your original, high-quality master file.
Choosing the Wrong Codec
Selecting an ancient, outdated codec will ruin your project. Older codecs do not understand how to pack data efficiently. They will either give you a massive file that is hard to share or a tiny file that looks like it was filmed on a potato. Always trust modern solutions to handle the math correctly.
Lowering Resolution Too Aggressively
While scaling down from 4K to 1080p is smart, taking a file down to 480p is usually a mistake in the modern era. Screens are simply too sharp today. A severely low resolution will look incredibly blurry and unprofessional, instantly damaging your brand image.
Ignoring Bitrate Settings
Many people just click the export button without looking at the data flow settings. If you leave the bitrate set to an absurdly high automatic level, your file will actually grow larger than the original. You must take a few seconds to understand and manage how much data is allowed to pass through the digital pipe.
Exporting at Unnecessary Quality Levels
Do not let your ego destroy your hard drive. You do not need cinema-level export settings for a quick ten-second clip of your cat doing something funny. Match your export quality to the actual importance and destination of the content.
How to Check Video Quality After Compression
Visual Inspection
The human eye is the best tool you have. Sit back and simply watch the new file from start to finish. Do not press your nose against the monitor looking for tiny flaws. Just watch it normally. If it looks good to you, it will look perfectly fine to your audience.
Side-by-Side Comparison
Open your massive original file and your new lightweight file side by side on your computer screen. Jump to a section with a lot of fast movement, like falling water or a busy street. This is where quality drops happen first. If the smaller file still looks clean during the busy moments, you have succeeded.
Measuring File Size Reduction
Right-click on both files and check their properties. Did you actually save a meaningful amount of space? If the new file is only two megabytes smaller than the original, you did not push the settings far enough. You want to see significant drops, like going from one gigabyte down to two hundred megabytes.
Testing Playback on Different Devices
A file might look great on your expensive computer monitor but terrible on a cheap smartphone screen. Send the new file to your phone and watch it there. Send it to a tablet if you have one. Ensuring the file plays smoothly across different everyday devices is a crucial final step.
Frequently Asked Questions
1. Can you compress a video without losing any quality?
Yes, you can absolutely shrink a file without hurting the picture. Using a process called lossless compression or simply switching to a smarter codec allows the computer to pack the data more efficiently. The file becomes physically lighter, but your eyes will not notice any difference in the colors or sharpness.
2. What is the best video format for compression?
MP4 is universally recognized as the best container for almost every situation. It holds high-quality visual data while keeping the digital footprint relatively small. More importantly, it is accepted by every social media platform, website builder, and mobile phone brand on the market today.
3. Is H.265 better than H.264?
In terms of pure technical efficiency, H.265 is significantly better. It can deliver the exact same visual beauty while taking up half the storage space. However, it requires a bit more computer power to play smoothly, so H.264 remains the safer choice for maximum compatibility with older devices.
4. How much can a video be compressed?
The amount of space you can save depends heavily on the original file. If you start with a massive, unedited 4K recording straight from a professional camera, you can often reduce the file by eighty percent or more without ruining the viewing experience.
5. Why does my compressed video look blurry?
Blurriness happens when you starve the file of data. If you lower the bitrate too drastically or scale the resolution down too far, the software physically cannot draw the fine details anymore. You must increase the bitrate slightly until the sharp edges and clear colors return.
Video Compression Checklist
- Always check your original file size before starting the process.
- Trim away boring introductions and dead space to save data instantly.
- Choose MP4 for maximum internet and device compatibility.
- Scale 4K footage down to 1080p if your audience mostly uses smartphones.
- Lower your frame rate to thirty if you are just speaking to the camera.
- Adjust your bitrate carefully to balance digital weight and visual clarity.
- Watch the final export on a mobile device to ensure perfect playback.
Final Thoughts
Mastering the art of digital media management is an absolute superpower for any modern creator or business owner. You no longer have to feel frustrated by slow upload bars, expensive hosting fees, or angry emails from clients who cannot open your attachments. By understanding how resolution, bitrate, and codecs work together, you take total control over your digital assets.
Always remember that the goal is not to create the smallest file possible, but rather the most efficient file possible. You want to perfectly balance stunning visual clarity with a lightweight digital footprint. We encourage you to use a trusted platform like multicompressor.com regularly. Build a healthy habit of optimizing your content before you publish it. Your website will run faster, your audience will enjoy a smoother streaming experience, and your digital life will become incredibly organized and stress-free.
Related Articles

Best Video Formats for Web, Social Media, and Email
Confused by video formats? Discover the top choices for websites, social media, and email, and learn how to shrink them effortlessly.
How to Compress Documents Without Losing Formatting
Are large document files messing up your emails? Learn how to shrink file sizes using a reliable document compressor without breaking your layout.
How to Compress Audio Files Without Losing Sound Quality
Are massive sound recordings slowing you down? Learn how to compress audio file data easily without losing quality using a trusted MP3 compressor.