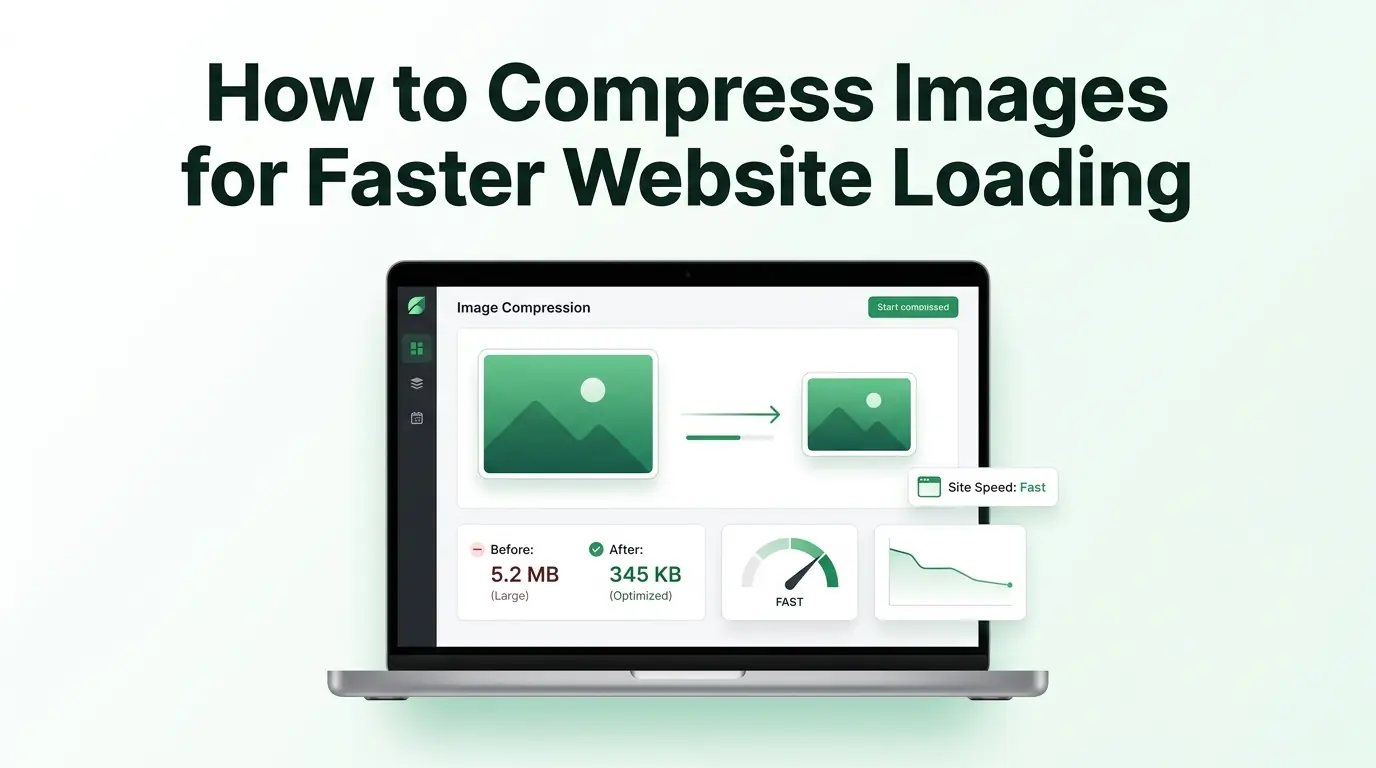
How to Compress Images for Faster Website Loading
Learn how to use an online image compressor to speed up your website. Reduce your bounce rates, boost mobile performance, and improve your search rankings.
Think about the last time you visited a website on your smartphone while waiting for a coffee. You clicked a promising link, but the screen stayed blank. A second passed, then two, then three. A giant header graphic slowly began to unfold down the screen like a sluggish window blind from the nineties. Chances are high that you did not wait around for that graphic to finish loading. You likely hit the back button and looked for a different website that could give you information instantly.
Website loading speed matters more than ever before. Internet users have absolutely no tolerance for slow-loading pages. We want our information, our shopping carts, and our entertainment to appear the exact millisecond we tap our screens. If your website takes more than a couple of seconds to display its content, your target audience will abandon you before they even get a chance to read your brilliant blog posts or browse your amazing products.
When it comes to website bloat, pictures are almost always the biggest troublemakers. High-resolution graphics from digital cameras and modern smartphones look absolutely gorgeous, but they carry massive file weights. Forcing a user's web browser to download multiple multi-megabyte pictures ruins the user experience and destroys your search engine visibility. This comprehensive guide will teach you exactly how to solve this problem by shrinking your media files down to a fraction of their original size while keeping them beautifully crisp.
Why Large Images Slow Down Websites
To fix a slow website, it helps to understand exactly what happens behind the scenes when a visitor lands on your URL. A web browser does not just magically display your page all at once. Instead, it has to download a long list of individual pieces of code, style sheets, scripts, and media components from your web hosting server.
How Browsers Load Images
Every single graphic on a web page requires a separate visual request from the browser to your server. If your homepage features twenty different photos, the browser has to make twenty individual trips back and forth across the internet to collect those pieces of data. The browser has to wait for these files to arrive before it can fully render the page layout and make it interactive for the user.
When these files are massive, a dangerous technical bottleneck occurs. The browser gets stuck downloading millions of tiny bits of data, causing the text, buttons, and menus to freeze up. Until those giant graphics finish downloading, your visitor is left staring at a broken, half-loaded screen that feels completely unresponsive.
The Hidden Cost of Unoptimized Images
Using heavy, unoptimized graphics comes with a massive hidden financial and operational cost. First, it drains your server bandwidth, which can lead to expensive overage fees from your web hosting provider. If thousands of visitors try to download giant files from your site at the exact same time, your entire server can crash from the heavy data overload.
Furthermore, slow websites trigger high bounce rates. A bounce happens when a user leaves your site after viewing only one single page. If your media files take five seconds to display, your bounce rate will soar, signaling to search engines that your website is not providing a good experience. Mobile shoppers suffer the most, as heavy media assets quickly eat up their limited cellular data plans and drain their smartphone batteries.
Real-World Example
Let us look at a practical example to see how much of a difference basic optimization makes. Imagine two different online clothing stores selling the exact same summer dress. Both stores display five beautiful photos of the dress on their product page.
The owner of Store A uploads the raw camera photos directly to the website. Each picture has a file weight of four megabytes, making the total page weight an astonishing twenty megabytes. When a mobile shopper tries to open this page on a standard cellular connection, the site takes nearly ten seconds to load, causing the frustrated shopper to leave immediately.
The owner of Store B uses a smart optimization workflow. They resize the dimensions of the graphics and run them through a compression tool. Each picture shrinks from four megabytes down to just eighty kilobytes. The entire page weight drops to less than half a megabyte, allowing the website to pop up onto the customer's screen in less than a second. Store B wins the customer every single time.
What Is Image Compression?
Image compression is the technical process of reducing the file size of a graphic asset without destroying its visible beauty. Think of it like packing a large travel suitcase. If you throw your clothes in carelessly, the suitcase will bulge open and refuse to close. But if you roll your clothes tightly and squeeze out the trapped pockets of air, you can fit everything into a small, lightweight bag.
Types of Compression
When you look into media compression, you will quickly discover two primary technical methods used to shrink your files. Both options approach data reduction differently, and each has its own distinct strengths and weaknesses.
Lossy Compression
Lossy compression works by permanently deleting tiny bits of color data and visual patterns that the human eye cannot easily notice. It is a highly effective way to achieve massive reductions in file weight. A robust lossy tool can frequently shrink a file by eighty percent or more, transforming a heavy asset into a lightweight web component.
The main advantage of the lossy approach is the sheer amount of space you save, which directly translates to blazing-fast website performance. The only real downside is that if you push the compression slider too far, you will start to see ugly pixelation, blurry edges, and distorted color patches. The key is finding that perfect sweet spot where the file size drops significantly but the visual change remains invisible to your audience.
Lossless Compression
Lossless compression takes a completely different path by keeping every single pixel of visual data perfectly intact. It never changes the actual look or quality of your photo. Instead, it looks inside the file code to remove redundant strings of data and strips out hidden metadata, such as the date the photo was taken, the camera settings used, and the GPS location of the shoot.
The biggest benefit of the lossless method is that your graphics will remain mathematically flawless, making it the perfect choice for intricate corporate logos, sharp text vector graphics, and highly detailed medical charts. However, because it leaves the actual pixel data alone, the file size savings are much smaller, usually hovering around ten to twenty percent.
Which Method Should You Choose?
For the vast majority of website owners, bloggers, and online shop keepers, lossy compression is the clear winner. You need your website to load as fast as humanly possible, and saving eighty percent on your file weight is simply too massive of an advantage to ignore. As long as your product shots and blog graphics look clean and clear to a regular visitor, the tiny loss in technical data does not matter at all. Save lossless compression strictly for your site logo and tiny navigation icons.
Benefits of Compressing Images
Investing a little bit of time into managing your website media gallery pays massive dividends across every single area of your digital business. It is one of those rare technical adjustments that offers immediate, measurable rewards for very little effort.
Faster Website Loading
The most obvious and immediate benefit is a massive boost in page speed. When you shrink your files down to under one hundred kilobytes each, you eliminate the data bottlenecks that keep your visitors waiting. Your pages will load smoothly, allowing users to jump from one section of your site to another without experiencing annoying delays.
Improved User Experience
A fast website feels incredibly responsive, polished, and professional. When your blog headers, product grids, and background textures load instantly as a user scrolls down the page, it creates a stress-free environment that encourages people to stick around. Visitors can find what they need quickly, which builds immense trust in your brand or business.
Better Mobile Performance
Mobile devices frequently rely on unpredictable cellular connections that can lag when downloading heavy files. By optimizing your media assets, you guarantee a fantastic browsing experience for users on the move. Your mobile pages will load quickly even on slower cellular networks, ensuring you do not lose a huge portion of your mobile audience.
Reduced Hosting and Bandwidth Costs
Every time a visitor opens your website, your web hosting server has to send data to their device. If your site is packed with heavy files, you will quickly consume your monthly bandwidth allowance. Compressing your media library reduces your total server load, allowing you to save money on web hosting plans and avoid unexpected overage fees.
Improved Search Engine Rankings
Search engine systems like Google want to provide users with the best possible websites at the top of their search results. Speed is a major ranking factor in modern search algorithms. If your website is lightning-fast because your media library is lightweight, search bots will reward you with higher visibility and more organic search traffic.
Better Core Web Vitals Scores
Google evaluates website performance using specific technical benchmarks known as Core Web Vitals. These metrics measure how fast the largest piece of content appears on the screen and how stable your page layout is while loading. Heavy graphics are the primary cause of poor Core Web Vitals scores. Optimizing your files cleans up these technical issues, giving your site an immediate boost in search algorithm performance.
Best Image Formats for Websites
Before you begin compressing your files, you need to understand the different file extensions used across the internet. Choosing the wrong Image file format can result in bloated sizes or terrible pixelation, so matching your graphic type to the right format is vital.
JPEG
The JPEG format is the classic workforce of internet photography. It has been around for decades and enjoys universal support across every single web browser and device in existence. It is exceptionally good at handling complex photographs with millions of blending colors, making it the default choice for blog headers and lifestyle shots.
JPEGs handle lossy compression beautifully, allowing you to shrink large files down to tiny sizes while keeping the visual quality looking crisp. The main limitation of JPEG is that it does not support transparent backgrounds, meaning a cutout product shot will always be stuck inside a solid white or colored box.
PNG
PNG files are fundamentally different because they support full alpha transparency. If you need to place a transparent logo or a clean graphic icon over a colorful background on your website, PNG is the format that allows you to do it. It uses lossless compression, ensuring that every line, shape, and word of text remains perfectly sharp.
The big catch with PNG files is that they are incredibly heavy. Because they store every single pixel of data perfectly, a complex photograph saved as a PNG can easily be five to ten times larger than a JPEG version of the exact same shot. Never use PNG for standard photographs or background landscapes.
WebP
WebP is a modern graphic format developed by Google specifically to replace old JPEG and PNG files. It offers incredibly advanced compression technology that can make your files significantly smaller than older formats while keeping the exact same level of visual clarity. It also supports transparency, giving you the best of both worlds.
Almost all modern web browsers and content management systems now fully support WebP. Converting your library over to WebP is one of the easiest ways to accelerate your website. It strips away massive amounts of hidden file weight while ensuring your pages look completely stunning.
AVIF
AVIF is an exciting new cutting-edge format that offers even better compression efficiency than WebP. It can shrink an image down to an incredibly tiny file size while preserving fine details, making it the absolute future of web performance.
The only real downside to AVIF right now is browser support. While modern platforms can read it, some older web browsers and legacy devices still cannot display AVIF graphics properly. Many advanced web setups handle this by serving AVIF to modern devices while keeping a backup JPEG file ready for older systems.
Format Comparison Table
To help you choose the best file extension for your specific project, let us look at a breakdown of how the top formats stack up against each other across the most important categories.
| Format | Compression Type | Ideal For | Browser Support |
|---|---|---|---|
| JPEG | Lossy | Complex photographs and lifestyle shots | Universal (100%) |
| PNG | Lossless | Clear logos, transparent graphics, and text | Universal (100%) |
| WebP | Lossy and Lossless | All-purpose web graphics and modern photos | Excellent (Modern browsers) |
| AVIF | High-efficiency Lossy,High-performance websites and next-gen designs | Growing (Modern devices) |
Step-by-Step Guide to Compress Images
Optimizing your website graphics does not require expensive software or complicated technical degrees. You can easily build a simple, highly effective compression routine using a free Online Image Compressor. Let us walk through the exact steps you should follow every single time you prepare media for your website.
1. Select the Best Format
Analyze the type of graphic you are working with. If it is a vibrant photograph with lots of natural colors, opt for JPEG or WebP. If it is a logo or graphic icon that needs a transparent background, select PNG. Matching your graphic to the right file type ensures you start with the best possible foundation.
2. Crop and Scale Dimensions
Never upload raw photos directly from a camera. Open your graphic in a basic editing tool and resize its physical pixel dimensions to match the section of your website where it will live. If a blog post image only needs to be eight hundred pixels wide, change the dimensions manually instead of forcing the website code to scale it down later.
3. Apply Compression Tools
Upload your resized graphic into a reliable Image Compressor. Adjust the quality slider down to around seventy or eighty percent for lossy formats. This triggers the tool to strip out hidden metadata, clear away redundant code, and optimize the file structure, dropping the total file size down to a fraction of its original weight.
4. Review Visual Clarity
Take a close look at the compressed preview before saving your work. Look for any distracting blurry patches, pixelation around fine lines, or weird color banding. If the graphic looks perfectly sharp to your eyes, you have successfully found the ideal balance between low file weight and great visual quality.
5. Final Web Upload
Download the lightweight compressed file to your computer and upload it straight to your website content management system. Make sure to write a descriptive filename and fill out your alt text fields immediately to maximize your search engine optimization benefits before publishing the page.
Recommended Image Sizes for Different Website Sections
To keep your website perfectly organized and performing at top speed, you need to use the correct physical dimensions for different sections of your layout. Using consistent dimensions creates a beautiful visual hierarchy and prevents accidental site lag.
- Hero Images: 1920 pixels wide by 1080 pixels high (Keep total file weight under 200 kilobytes)
- Blog Post Images: 1200 pixels wide by 630 pixels high (Keep total file weight under 100 kilobytes)
- Product Pages: 1000 pixels wide by 1000 pixels high (Keep total file weight under 80 kilobytes)
- Thumbnails: 150 pixels wide by 150 pixels high (Keep total file weight under 10 kilobytes)
- Portfolio Showcases: 1600 pixels wide by 1200 pixels high (Keep total file weight under 150 kilobytes)
How to Compress Images Without Noticeable Quality Loss
The biggest fear most website owners have is that compression will make their beautiful graphics look cheap, blurry, and unprofessional. Fortunately, you can easily avoid any visible drop in quality by following a few simple, professional tips during your optimization workflow.
Use Appropriate Quality Settings
When using an online optimization tool, never set the compression slider to the absolute maximum setting. Dropping the quality all the way down to twenty or thirty percent will destroy the fine details of your photo, leaving behind a messy grid of ugly pixels. Stick to a comfortable range between seventy and eighty percent quality. This allows you to harvest almost all of the file size savings while keeping your graphics looking completely flawless to your visitors.
Avoid Multiple Re-Exports
Every single time you open a JPEG file, edit it, and save it again using lossy compression, the file loses a little bit of its data structure. If you repeat this process four or five times, those tiny data losses will compound, causing your photo to look noticeably fuzzy and degraded. Do all your editing work first, and only apply the final compression step once right before you upload the file to your web server.
Keep Original Copies
Always keep a separate folder on your computer for your raw, uncompressed master photos. If you ever need to crop a photo differently, resize it for a new theme layout, or print it out on paper down the road, you will need that pristine original file. Only perform your compression steps on duplicate copies of your graphics so you never accidentally destroy your master assets.
Test Different Compression Levels
Every single photograph reacts to compression algorithms a little bit differently. A simple graphic with large blocks of solid color can handle aggressive compression easily without showing any flaws. A complex crowd shot with lots of tiny details and varied lighting might require a gentler touch to keep from looking pixelated. Spend a few extra seconds testing different levels to find the perfect setting for each unique graphic.
Advanced Image Optimization Techniques
Once you master the basic steps of resizing and compressing your files, you can implement a few advanced modern techniques to push your website performance even further. These strategies require a bit of automated setup but offer incredible results.
Responsive Images
Responsive image setup allows your website code to automatically detect the exact screen size of the device your visitor is using. The site then serves up a perfectly matched file size from a pre-made list of options. A desktop monitor gets a large, clear graphic, while a small smartphone gets a lightweight version, saving mobile data and boosting speed.
Lazy Loading
Lazy loading is a brilliant technique that tells a web browser to hold off on downloading images until they are actually needed. Instead of forcing a computer to download every single photo on a long page all at once, the browser only loads the pictures currently visible on the screen. The remaining media assets further down the page are downloaded right as the user scrolls them into view.
CDN Image Delivery
A Content Delivery Network, or CDN, is a globally connected network of cloud servers scattered all around the world. When you use an image CDN, copies of your media files are stored on these regional servers. When a visitor opens your site, the CDN serves up the graphics from the server physically closest to their location, cutting down on data travel times.
Next-Generation Formats
Take full advantage of modern web coding by configuring your site to automatically serve next-generation formats like WebP or AVIF whenever possible. These modern formats use highly efficient mathematical formulas to compress files far better than old legacy formats, allowing you to build an incredibly fast website without sacrificing your visual presentation.
Common Image Compression Mistakes
It is incredibly easy to make simple mistakes when trying to clean up your website media library. Staying aware of these common pitfalls will help you keep your site running smoothly and looking completely professional.
Compressing Too Aggressively
The most common mistake beginners make is over-compressing their files in a desperate bid to make their website load faster. If your product photos or portfolio items look blurry, blocky, or washed out, you will quickly lose the trust of your potential customers. Never sacrifice the necessary visual appeal of your business just to save a few extra kilobytes of data.
Uploading Oversized Images
Many store keepers resize their images using website code instead of changing the actual file dimensions before uploading. If you upload a three-thousand-pixel photo and tell your website style sheet to display it inside a tiny three-hundred-pixel box, the user's browser still has to waste time downloading the entire giant file. Always match your physical dimensions to your layout box before uploading.
Ignoring Mobile Users
Never assume that because your website looks completely stunning on your large office desktop computer, it works beautifully for your mobile audience. Always test your site layout on real smartphones and tablets using throttled mobile data connections. If your graphics cause mobile screens to lag or freeze, you need to go back and apply more effective compression.
Using the Wrong File Format
Saving a basic color photograph as a lossless PNG or a simple text logo as a lossy JPEG is an easy way to ruin your site presentation. Take the extra time to evaluate each graphic file type individually so you always use the correct format for the specific type of visual content you are publishing.
Forgetting Alt Text
Optimization is not just about file sizes; it is also about accessibility and discovery. Skipping your alt text lines leaves visually impaired visitors completely in the dark and deprives search engines of the context they need to understand your content. Always fill out your alt text fields with clear, descriptive sentences.
Measuring the Impact of Image Compression
To see how much your optimization efforts are truly helping your business, you need to measure your website performance before and after cleaning up your library. Using free testing tools provides clear, actionable data that proves your hard work is paying off.
Page Speed Testing Tools
There are several incredible, completely free speed testing platforms available online, such as Google PageSpeed Insights, GTmetrix, and Pingdom. All you have to do is type your website URL into these tools, and they will analyze your page performance, giving you a detailed breakdown of your site weight, loading times, and hidden technical glitches.
Metrics to Watch
When analyzing your speed test reports, do not just look at the overall score. Pay close attention to a few critical performance metrics that directly impact your user experience and search engine visibility.
- Largest Contentful Paint (LCP): Tracks how long it takes for the main visual content of your page to appear on the screen.
- First Contentful Paint (FCP): Measures the exact millisecond the first piece of text or graphic element becomes visible.
- Total Page Size: Shows the total cumulative weight of your page files, which you want to keep as low as possible.
- Fully Loaded Time: Calculates the total time it takes for every single script, style sheet, and graphic asset to finish downloading.
Before-and-After Analysis
Run a comprehensive speed test on an unoptimized page first and write down the metrics. Next, take all the graphics from that page, resize their dimensions, run them through an online compressor, convert them to WebP, and upload them back to your site. Run the speed test a second time, and you will see a massive drop in loading times and total page size, proving that image optimization is the ultimate shortcut to a fast website.
Image Compression Best Practices Checklist
To make sure you never miss a step when managing your digital media library, keep this handy best practices checklist nearby whenever you are publishing new content.
- Crop and scale the physical pixel dimensions of your photo to match your theme layout exactly before doing anything else.
- Select the ideal file format for your graphic type, preferring WebP or JPEG for photographs and PNG for transparent logos.
- Run every single graphic asset through an online lossy compressor to strip away hidden metadata and reduce file weights under one hundred kilobytes.
- Rename your file using descriptive English keywords separated by simple hyphens instead of leaving generic camera labels.
- Write natural, helpful alt text sentences for every upload to guarantee excellent site accessibility and boost your search visibility.
- Double check that your website theme has lazy loading enabled for all media files that live below the initial viewing screen.
- Schedule a regular website speed audit once every few months to monitor your loading times and catch any oversized files.
5 Frequently Asked Questions
1. Does image compression affect image quality?
Yes, image compression can affect quality if you use lossy compression too aggressively. If you set your compression tools to extremely low quality levels, your graphics will start to look blurry and pixelated. However, if you keep your settings within a safe range of seventy to eighty percent quality, you can achieve massive file size reductions while keeping any visual changes completely invisible to your human visitors.
2. What image format is best for websites?
WebP is generally considered the best all-around format for modern websites because it offers superior compression efficiency and supports transparency. For older systems or maximum compatibility, JPEG remains the absolute best choice for standard photographs, while PNG should be reserved strictly for simple logos and icons that require a see-through background.
3. How much can image compression reduce file size?
A high-quality lossy compression tool can frequently reduce the file size of a standard photograph by seventy to eighty percent. This means a heavy three-megabyte raw camera file can easily be shrunken down to under one hundred kilobytes, allowing it to load almost instantly on web browsers without sacrificing its core visual clarity.
4. Is WebP better than JPEG?
Yes, WebP is significantly better than JPEG for web usage because its modern algorithms can compress files roughly twenty-five to thirty percent smaller than traditional JPEGs at the exact same level of visual quality. It also includes support for transparent backgrounds, making it a highly versatile, performance-focused option for web design.
5. Should every image on a website be compressed?
Yes, you should absolutely compress every single graphic asset uploaded to your website without exception. Even a few unoptimized, heavy files can create a major technical bottleneck that slows down your entire page loading speed, hurts your search engine rankings, and drives frustrated visitors away from your online platform.
Wrapping Things Up
Taking control of your website media gallery is one of the smartest, most effective ways to accelerate your page loading speeds, delight your audience, and stay highly competitive in modern search results. Finding that ideal balance between gorgeous visual presentation and lightning-fast loading performance does not have to be difficult. By making a few simple, conscious adjustments to your creative workflow, you can build a streamlined website that keeps users engaged from the very first second they arrive.
Do not think of image management as a frustrating chore or a complicated technical hurdle. Look at it as a regular, healthy maintenance routine for your digital business or personal blog. Incorporate these simple compression steps into your regular uploading habits, and you will notice an immediate, measurable improvement in your traffic, user engagement, and sales. Your visitors will thank you with their attention, and your business will thrive because of it.
Related Articles
How to Optimize Images for E-Commerce Product Pages
Learn how to optimize images for your e-commerce product pages. Boost your page speed, improve user SEO rankings, and increase your online sales today.
How to Compress Photos Before Uploading to Social Media
Stop platforms from ruining your picture quality. Learn how to compress photos easily before uploading and keep your images looking perfectly sharp.
Best JPG Image Compressor Tool 2026
Speed up your website today with our free JPG image compressor. Easily reduce large photo file sizes without losing quality at multicompressor.com.